Fast Turf Burn Treatment: Stop the Pain & Prevent Infection
Educational information only – read the full notice
Turf Burns - How to Treat and Clean 3G Pitch Abrasions
Turf burns on 3G pitches aren't the same as grass burns.
Synthetic surfaces drive rubber crumb and nylon fibres straight into the skin, turning a graze into a contaminated wound.
Get the first ten minutes right and it heals in a week. Get it wrong and you're looking at a slow-healing mess. Here's exactly what to do.
⚡ Quick First-Aid Protocol (First 10 Minutes)
- Flush (60 seconds): flush continuously with clean water or sterile saline. Do not scrub.
- Lift debris: gently dab out rubber crumb (SBR) using sterile gauze.
- Moist dressing: apply a non-stick pad or hydrocolloid dressing (skip standard plasters).
- Infection watch: if redness spreads past 48 hours, consult a medical professional immediately.
You can order the CSH specialist turf burn kit here
Why 3G and 4G pitches cause worse abrasions
Natural grass gives way. Synthetic turf doesn't. At pace it acts more like coarse sandpaper than a playing field.
That black rubber crumb you find in your socks gets driven into the wound on impact, and nylon fibres from the pile can break off and embed in the skin. So a turf burn that looks superficial often isn't: it holds foreign material and whatever bacterial load has been sitting in that infill across hundreds of sessions.
Worth knowing: the crumb is mostly SBR (styrene-butadiene rubber), recycled from vehicle tyres. Research is ongoing on whether it carries extra contamination risk, and it's not settled yet. The sensible position doesn't depend on the answer:
Irrigate thoroughly, remove all visible debris, and treat the wound as contaminated until it's clean.
Backs and wingers get it worst. Diving at pace means forearms, knees and hips take the hit, and those are the hardest areas to keep clean.
Watch: the doctor's version
Dr Asoka Wijayawickrama on the degrees of turf and mat burn, healing times and the optimal treatment route.
The first ten minutes: treatment step by step
This stage is about getting the debris out, not making it look tidy. In order:
1. Flush with clean water
Use a water bottle if that's all you've got. Run water across the wound to wash out crumb and loose fibre for a full minute, longer than feels necessary. Clean drinking water or sterile saline is ideal, and a pharmacist can tell you what's worth keeping in the kit bag.
2. Lift out the debris
Use a clean cloth or gauze to gently lift out anything left. Don't scrub, it drives grit deeper and damages tissue. Pat and lift.
3. Keep it clean
Once the debris is out, keep the wound and the skin around it clean with water or sterile saline before you dress it. For anything past a minor graze, or if you're not sure it's fully clean, ask a pharmacist about the right wound cleanser. These are first-aid calls best guided by a professional.
4. Cover it properly
Dressing choice matters more than most players think:
- Skip standard plasters on anything but small dry cuts, they stick to a weeping wound and tear off healing tissue.
- Use non-stick pads (Melolin-type) for most turf burns, they sit over the wound without bonding to it.
- Go hydrocolloid on high-friction spots (forearms, hips) that'll get re-abraded, they hold up better under kit and keep a moist healing environment.
- Secure with medical tape and change the dressing when it's saturated, or at least daily.
See a GP if you spot any of these (24–48 hrs after)
- Redness spreading beyond the wound (streaking is a red flag)
- Warmth and swelling getting worse, not better
- Pus or cloudy discharge
- Fever, or swollen glands near the injury
- No sign of closing after 5 to 7 days
First aid, kit-bag sized
Everything in the steps above lives in one clear box: sterile saline for flushing out grit and rubber crumb, cooling burn gel, non-adherent dressings sized for thighs and knees, and tape that holds on a curve. The CSH Turf & Mat Burn First Aid Kit (£14.89) sits in your kit bag so the first ten minutes happen on the touchline, not after the drive home. Components are CE/UKCA marked from a UK medical supplier.
A first aid kit for minor friction burns, not a medicine. It will not treat an infection - spreading redness, pus or feeling unwell means a pharmacist, GP or 111.
When to stop self-managing
Most turf burns heal cleanly in a week if you treat them right from the start. The ones that don't were usually under-irrigated, or covered in a way that trapped moisture and warmth.
As a size guide: any turf burn bigger than a 50p coin that goes deeper than the surface layer, where the wound base looks pale, fatty or clearly different to the skin around it, is worth a GP or walk-in review rather than managing yourself. Burns on joints like elbows and knees especially, since movement stops them closing.
Synthetic pitches have a reputation for stubborn wound problems, and it's earned. If in doubt, get it looked at. Our post on staph, boils and MRSA in rugby shows what an escalating wound problem can look like.
How Long Does a 3G Turf Burn Take to Heal?
As a general guide, a shallow turf burn that was flushed properly and kept covered with a moist dressing tends to close in 5 to 7 days. Deeper abrasions, burns over joints like knees and elbows, and wounds that got a poor first clean can take two weeks or more, because movement and leftover debris keep reopening them.
The pattern matters more than the number. A healing burn should look calmer every couple of days: less weeping, less redness, edges pulling in. If yours is getting redder, wetter or more painful as the days pass, or there is no sign of closing after a week, that is a wound to show a GP or pharmacist rather than keep dressing yourself.
What to Put on a Turf Burn (and What to Avoid)
Once the wound is clean, the goal is a moist, covered healing environment. That is the job of the non-stick pad or hydrocolloid dressing above, and for most shallow burns nothing else is needed. If you want a barrier layer under a dressing, ask a pharmacist about a plain petroleum-jelly-type product; keeping the wound surface from drying into a hard crust is what stops the dressing pulling on new tissue at every change.
Just as important is what to keep away from an open graze:
- Neat antiseptic liquids, alcohol wipes and hydrogen peroxide sting and can damage the fragile new tissue trying to close the wound. Clean water or saline does the flushing job better.
- Powders and "let it crust over" approaches slow healing on a friction-prone area, and a dry scab over a joint cracks every time it bends.
- Kitchen remedies like butter, vinegar or toothpaste have no place on broken skin.
If you are unsure about any product, ask the pharmacist before it goes anywhere near an open wound. Anything already inflamed, weeping or possibly infected belongs with a GP, not a shopping basket.
Prevention: cover the skin you'd otherwise lose
The simplest fix is the obvious one, cover up:
- Compression arm sleeves for forearms
- Base-layer shorts for hips and thighs
- Long-sleeve undershirts for shoulders and elbows
Modern compression fabric also cuts the friction at impact, so the sleeve slides on the turf instead of your forearm. And it's not just a forwards thing, wingers and backs diving at full sprint take some of the worst of it. A sleeve is cheaper and a lot less painful than a week of dressing changes.
Turf Burn Healing Stages: What Each Week Looks Like
Knowing the normal sequence makes it much easier to spot when something has gone wrong.
- Days 0 to 2, weeping and raw. The wound looks wet, may seep clear or slightly straw-coloured fluid, and stings badly in the shower. This is normal for an abrasion and is exactly why a moist dressing beats a dry crust here.
- Days 2 to 5, the peak of ugly. Some redness at the edges, a soft yellowish film over the wound bed in places, and tenderness. That film is often normal healing tissue rather than infection, which is why the trend matters more than any single day's photo.
- Days 5 to 10, closing. The wound bed dries, edges pull inward, itching often kicks in. Do not pick at it, especially on a joint.
- Weeks 2 to 8, the pink patch. New skin arrives thinner and pinker than the surrounding area and gradually fades. Keep it out of strong sun where you can, since fresh skin marks more easily.
The one rule cutting across all four stages: healing should trend calmer. Getting redder, wetter, hotter or more painful as days pass is the pattern that sends you to a GP, not the calendar.
How to Heal a Turf Burn Fast
There's no magic product. But a handful of things genuinely change how quickly a turf burn closes, and a few reliably slow it down.
| Speeds healing up | Slows healing down |
|---|---|
| Getting every bit of grit and rubber crumb out on day one | Leaving debris in, which keeps the wound inflamed |
| Keeping it covered with a non-stick or hydrocolloid dressing, so it stays moist | Leaving it open to "breathe" until a hard scab forms |
| Soaking a stuck dressing off with clean water | Ripping a dried-on dressing off, and the new skin with it |
| Protecting it at the next session with a dressing and a sleeve | Taking another knock on it before it has closed |
| Sleeping well and eating properly | Smoking, which is known to slow wound healing |
| Rinsing with clean water, as NHS guidance recommends | Dousing it in strong antiseptic every day |
Why covered and moist beats a scab. New skin grows in from the edges of a wound. It moves across a moist, protected surface far more easily than it can burrow underneath a hard, cracking scab. That's why modern wound care, and this guide, favour a proper dressing over leaving it open.


Realistic timescales. NHS guidance says most grazes start to heal within a few days. The week-by-week stages above show what normal looks like. A turf burn that isn't clearly improving after a week or so, or that's getting redder, hotter or more painful, needs looking at.
Sources: NHS: cuts and grazes
Turf Burn on the Knee, Elbow or Leg
Knees, elbows, hips and forearms take most turf burns because they hit the ground first in a tackle, a dive or a slide. They're also the hardest places to heal: every step or arm movement stretches the skin and pulls at the dressing.
| Where | Why it's tricky | What helps |
|---|---|---|
| Knee | Bends with every step, so dressings lift at the edges and the wound keeps reopening | Use a dressing big enough to overlap healthy skin on every side. A flexible fabric tape and a light knee sleeve over the top stop it rolling. |
| Elbow | Constant bending, and it takes the next fall too | Same approach as the knee. A long-sleeve base layer at training protects it once it has closed. |
| Hip and thigh | Shorts and kit rub it all session | Keep the dressing flat and smooth. Compression shorts hold it in place and take the friction. |
| Shin and lower leg | Socks and shin pads rub directly on it | Secure the dressing under the sock without taping so tight it cuts off circulation. |
| Forearm | Takes the brunt when you break a fall | Easier to dress than a joint. A sleeve or rashguard protects it for contact sessions. |
Going back to training on it. A clean, closed turf burn under a secure dressing is a very different thing from an open, weeping one. If it's still weeping, looks infected, or you can't keep it covered for the whole session, give it more time. It protects your teammates as much as it protects you.
Is It a Turf Burn or a Grass Burn? Why the Surface Changes the Care
People use the terms interchangeably, and the first-aid basics are the same for both: flush, lift debris, cover with a moist dressing. The difference is what goes into the wound.
A grass burn from natural turf carries soil, grass and general pitch dirt. A 3G or 4G burn adds rubber crumb and nylon fibre that lodge in the skin, as covered above. Practically, that means synthetic-pitch abrasions usually need a longer, more thorough flush and a closer inspection afterwards for anything still embedded. Both deserve the same respect; the artificial surface simply gives you more to remove and a rougher wound edge to work with.
Sleeping With a Turf Burn Without Wrecking It
Nights are where good daytime wound care gets undone, particularly with hip, knee and forearm burns.
- Dress it before bed, always. A fresh, clean dressing beats letting it dry onto the sheets and tear open when you roll over.
- Old sheets, clean sheets. Weeping wounds mark bedding. Use something you do not mind staining, and wash it more often than usual while the burn is open.
- Position away from the burn. A pillow wedged behind you keeps you off a hip burn; a pillow under the arm keeps a forearm free.
- Loose cotton, not tight synthetics. Less friction on the dressing overnight means less re-opening in the morning.
- Change the dressing on waking if it is saturated or has shifted overnight.
If pain is stopping you sleeping night after night, that is not something to tough out. Ask a pharmacist about appropriate pain relief and have the wound looked at, since disproportionate pain can be a sign it needs attention.
What an Infected Turf Burn Looks Like
Most turf burns never get infected. The ones that do tend to announce it, and the signs are the same ones listed earlier: redness spreading outward rather than shrinking, increasing rather than easing pain, warmth and swelling that build over hours, thick or cloudy pus, an unpleasant smell, or feeling generally unwell or feverish. Red streaks running away from the wound, or swollen glands nearby, mean same-day medical advice rather than a wait-and-see.
The reason this matters more on synthetic pitches is the contamination described earlier: crumb and fibre driven into the wound are foreign material, and anything left behind gives an infection somewhere to start. In contact sports there is a second reason to act early, because skin infections spread between team-mates. Our guide to staph, boils and MRSA in rugby covers what an escalating wound problem looks like and when it stops being a first-aid job.
Turf Burn in Football, Soccer and American Football
The name gives it away: turf burn isn't really a rugby problem, it's an artificial pitch problem. Anyone who slides, dives or gets tackled on 3G, 4G or astroturf ends up with the same injury:
- Goalkeepers diving on the same side, week after week.
- Outfield players making slide tackles, and anyone who goes down at pace.
- American football players, especially linemen, and receivers who dive for catches.
- Kids playing on school and five-a-side astro pitches in shorts.
For parents, the treatment in this guide is exactly the same for a child. The practical bit is having the basics in the kit bag, so the first clean happens at the side of the pitch rather than two hours later at home: clean water, non-stick dressings and tape.
Real-world case: why professional teams take turf burns seriously
During the 2003 NFL season, 5 of the St Louis Rams' 58 players developed MRSA infections (MRSA is a type of staph that resists some common antibiotics). There were 8 infections in total, and every one of them started at a turf burn. Linemen and linebackers were the most affected. The investigation was led by the US Centers for Disease Control and Prevention and published in the New England Journal of Medicine.
That same autumn, a college American football team in Connecticut had 10 players with MRSA skin infections, 2 of whom were admitted to hospital. Players with turf burns were around 7 times more likely to be infected. The investigators recommended preventing turf burns in the first place, and warned players about body shaving, which was also linked to infection.
Source: Kazakova SV et al. N Engl J Med 2005;352:468-75; Begier EM et al. Clin Infect Dis 2004;39:1446-53
The takeaway isn't to panic about every graze. A turf burn is an open wound on a surface a whole squad shares, and the basics in this guide are what those investigations pointed to: clean it, cover it, don't share towels, and get it seen if it turns hot, swollen or angry.
Post-training kit bag protocol
A turf burn that isn't dressed at the end of training is an open wound in a changing room. Sort it before you shower, don't let a weeping burn sit while you queue.
Clean your kit bag too. Rubber crumb gets into everything, and if it lands on kit worn against broken skin you're re-contaminating a healing wound. The Ultimate Rugby Kit Bag Hygiene Checklist has the full routine.
Turf Burn FAQs
Can you play rugby with a turf burn?
For a shallow graze that has been cleaned and can be securely covered, many players carry on, and that is a call for you and whoever runs first aid at your club. Be honest about the trade-off though: playing on means the dressing takes repeated friction, the burn re-opens more easily, and healing takes longer. A deeper burn, anything on a joint that keeps splitting, or any sign of infection is a sit-out, not a strapping job.
Should a turf burn be kept moist or dry?
Moist and covered. Modern first-aid practice favours moist wound healing under a proper dressing over the old "let it breathe" scab approach: the wound closes faster, the new tissue stays flexible, and the dressing does not tear healing skin away at each change. Air-drying an abrasion on a moving joint usually just means the scab splits open at training on Tuesday. This is exactly why the hydrocolloid and non-stick options above earn their place in the kit bag.
Do turf burns scar?
Most shallow ones heal without a permanent mark provided they are cleaned well, kept covered, not picked at and not allowed to get infected. A pink or slightly darker patch often remains for weeks to months before fading. Deeper burns, infection and repeated re-opening all raise the risk of a lasting mark, which is another argument for covering properly and sitting out when sense says so. If a mark concerns you or is not fading as expected, that is a GP or pharmacist conversation.
Why does a turf burn sting so much in the shower?
An abrasion strips the top layer of skin and leaves nerve endings exposed, so hot water and soap land on them directly. Practical fixes: use cooler water over the wound, let soapy water run around rather than directly across it, pat dry with a clean towel and dress it before you leave the changing room. Our post-match rugby hygiene guide covers the full first hour after the whistle.
Related guides
Keep reading
- How to treat mat burn – the treatment side: modern wound care, dressings and taping for training.
- Staph, boils and MRSA in rugby – what an infected graze can turn into, and the signs to act on.
- Post-match rugby hygiene – the first hour after the whistle is when grazes are won or lost.
- Mat burn and friction skin care – the indoor cousin of turf burn, same friction problem.
Before your next session
Sort the kit tonight, not after the sore shows up
Every guide on this site ends the same way: sweat off fast, broken skin covered, gear dry, towel your own. That takes kit you carry, not kit you mean to buy. If any of these six is missing from your bag, this is the one to fix before you train again.

CSH Personal First Aid Kit
Washproof and hydrocolloid plasters, saline wipes and tape, in your bag
£26.99

The Ultimate Mat & Turf Burn Treatment Kit
Built for the grazes that let infection in
£14.89
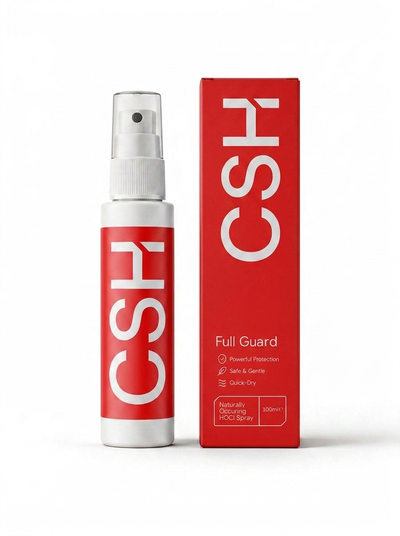
Full Guard V2
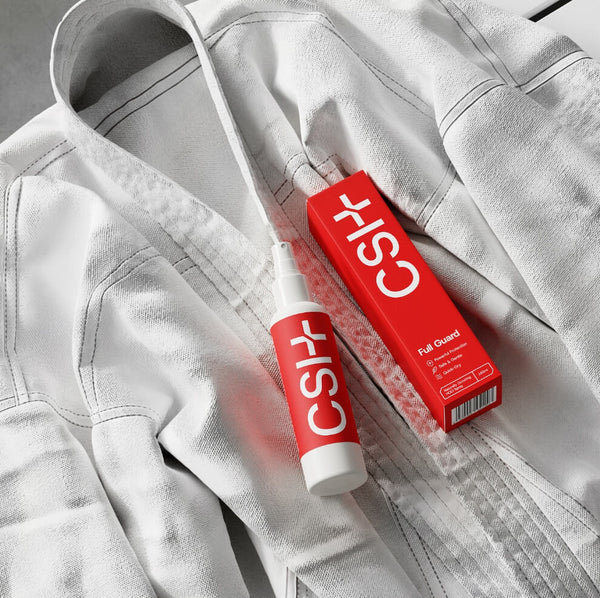
Rinse-free skin cleansing for the gap between training and the shower
£16.49
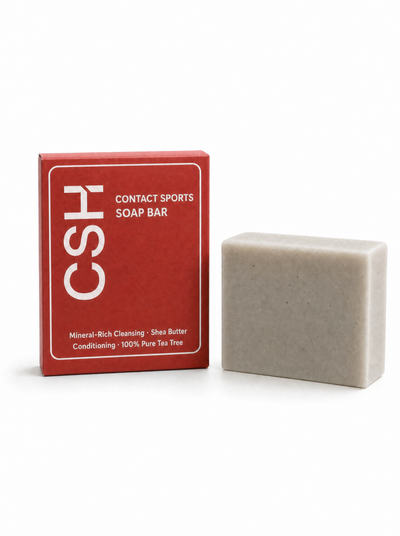
Athlete Soap Bar
The post-training shower, done properly
£8.49
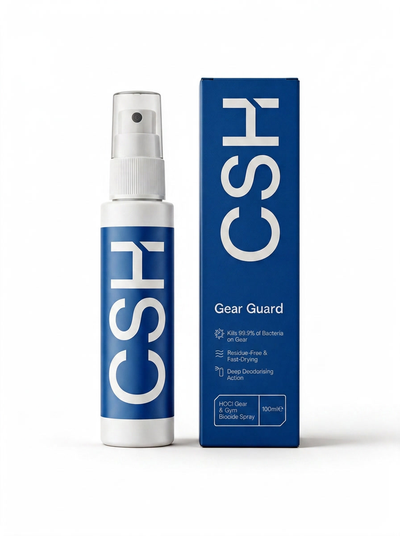
Gear Guard
For headgear, gloves, pads and the bag itself
£16.49
Moisture Wicking Sports Towel
Your own, washed after every session
£3.99
Get the full kit → See everything in the rugby hygiene and first aid collection
Full Guard and the soap bars are cosmetics for cleansing the skin. First aid kits are CE/UKCA marked wound-care items, not medicines. Gear Guard is an equipment cleaner; use biocides safely and read the label. Nothing here prevents or treats a skin infection: if you think you have one, see a pharmacist or GP.